
DISK IMAGING
All hard drive will fail, and if that happens to yours, it will be a big disaster on your file. So before you lost all of your important files, think of a way on how to backup it all. On this tutorial, I will show you how to backup your drive using a full backup of Acronis True Image on Hiren's 13.0.


3. Select Acronis True Image Home 2011.


5. Select the partition you want to backup and click next.

7. In this example, we will backup the drive C (containing system files) in local disk D. Type the filename and click OK.

8. Click Create a new backup then click next to continue.

9. After reviewing the summary of your actions regarding your backup, click Proceed.

10. Click OK when the backup operation suceeded.
11. Close the application and restart the system.
12. On your system open the directory where you backup the drive. Here you could see that it was compressed. Keep this backup so when your hard drive failed to load your operating system you will just restore it using the same software.

2. Select Operations and click Restore.

3. Select your back up image. then click Next. Make sure you remember where you saved your back up. Use the browse button to look for it.

4. Select Restore whole disks and partitions so the whole system will be restored. Including the applications software, the settings of your computer and the files saved on that partitions the time you back up.

5. Click Next after configuring the settings for that partition.

6. Use commands set by default then click next.

7. You could see under the summary what you will experience so just click next. Just remember that you need to reboot your computer after clicking the proceed button and the deleting of partitions.


All hard drive will fail, and if that happens to yours, it will be a big disaster on your file. So before you lost all of your important files, think of a way on how to backup it all. On this tutorial, I will show you how to backup your drive using a full backup of Acronis True Image on Hiren's 13.0.
1. Boot from your hiren's bootable CD. Select Hiren's BootCD 13.0 Rebuild by DLC Menu

2. Select backup menu.

3. Select Acronis True Image Home 2011.

4. Inside Acronis True Image Home 2011 window, Click Backup then choose Disk and Partition Backup.

5. Select the partition you want to backup and click next.

6. Now let us locate where to save our back up. Remember to know first the disk space used by the partition you are backing up and look for any partition larger than your backup. If you dont have any other partition, you could use an external storage device if possible. 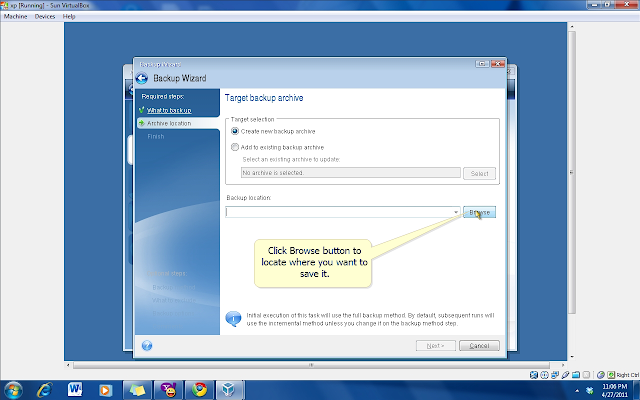

7. In this example, we will backup the drive C (containing system files) in local disk D. Type the filename and click OK.

8. Click Create a new backup then click next to continue.

9. After reviewing the summary of your actions regarding your backup, click Proceed.

10. Click OK when the backup operation suceeded.
HOW TO RESTORE YOUR BACKUP?
After Creating a disk image of your system, make sure it will be safe. you could also hide it so no one could make any changes about it, deleting it for example. Also having a copy of it will help. Your backup is your last solution whenever you experience downtime on your unit and no other solutions but to restore its good system. One good thing about this is you don't need to perform again the reinstallation process of your O.S. and other application software which might consume a longer time. Using your disk image you could bring back the system in good condition and the application software included the time you perform the back up, and it will only take for a minutes depending on your computer performance.
So let us restore what we back up. Follow these steps:
1. Run the Acronis True Image.

2. Select Operations and click Restore.

3. Select your back up image. then click Next. Make sure you remember where you saved your back up. Use the browse button to look for it.

4. Select Restore whole disks and partitions so the whole system will be restored. Including the applications software, the settings of your computer and the files saved on that partitions the time you back up.

5. Click Next after configuring the settings for that partition.

6. Use commands set by default then click next.

7. You could see under the summary what you will experience so just click next. Just remember that you need to reboot your computer after clicking the proceed button and the deleting of partitions.

For me, disc imaging is a good backup and maintenance solution for a computer shops, for offices with a number of computers having different specifications. This will save you during your downtime. Personal computer users could also perform disk imaging and restoration so their work will be continue quickly after the restoration.


